Transform Your Fabric Scraps into a Beautiful Simple Quilt
Are you looking to breathe new life into your fabric scraps? Making a quilt is a wonderful way to transform leftover material into something beautiful and functional. In this guide, we’ll take you through the steps to create a simple quilt that’s perfect for beginners, ensuring that your crafting experience is enjoyable and rewarding.
Gather Your Materials
Before we dive into quilting, let’s gather the materials you’ll need. For this project, you’ll require: fabric scraps (cotton works best), a rotary cutter or scissors, cutting mat, quilting ruler, thread (matching colors), sewing machine (or needle and thread for hand sewing), and batting for the quilt’s interior. Make sure to choose fabrics that complement each other in color and pattern for an aesthetically pleasing result.
Choose Your Quilt Design
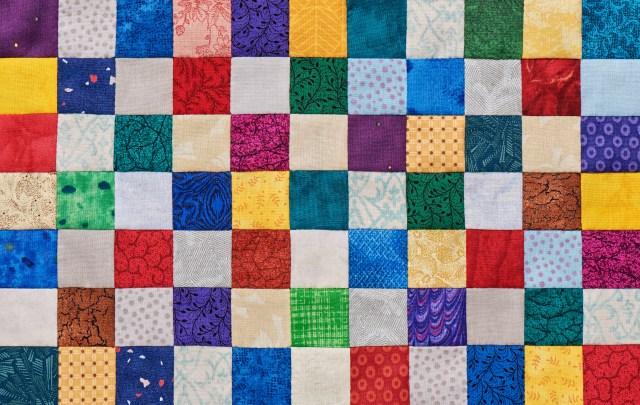
As a beginner, it’s best to start with a simple design that doesn’t require complicated piecing. A patchwork quilt is an excellent choice. You can decide on square blocks or rectangles based on your scrap sizes. Popular patterns include the nine-patch or log cabin designs which allow you to play with different colors without overwhelming complexity. Sketch out your design on paper before proceeding.
Cut Your Fabric Pieces
Once you’ve decided on your design, it’s time to cut the fabric pieces according to your chosen pattern. Use your rotary cutter and cutting mat for clean edges. If you’re going with squares, 5-inch squares are common for beginner projects but feel free to adjust based on what size scraps you have available. Remember: accuracy is key in cutting so take your time here.
Sewing the Quilt Top
Now comes the fun part: sewing. Start by piecing together your fabric squares or rectangles as per your design layout. If you’re using a sewing machine, ensure you’re using a quarter-inch seam allowance which is standard in quilting. Press each seam open after sewing; this will help reduce bulk when you layer everything together later.
Assemble Your Quilt Layers
Once you’ve completed sewing the quilt top, it’s time to assemble all layers: quilt top, batting, and backing fabric (which can also be made from another piece of fabric). Lay them flat in this order: backing face down on the surface; batting on top of it; then place the quilt top right side up atop these layers. Pin them together securely so they don’t shift while you sew around the edges.
Finally, trim any excess batting and backing fabric from around the edges of your quilt before binding it off neatly with bias tape or another preferred method of finishing seams. Congratulations. You now have a beautiful simple quilt made from recycled scraps that not only showcases creativity but also offers warmth and comfort.
This text was generated using a large language model, and select text has been reviewed and moderated for purposes such as readability.